
Progress
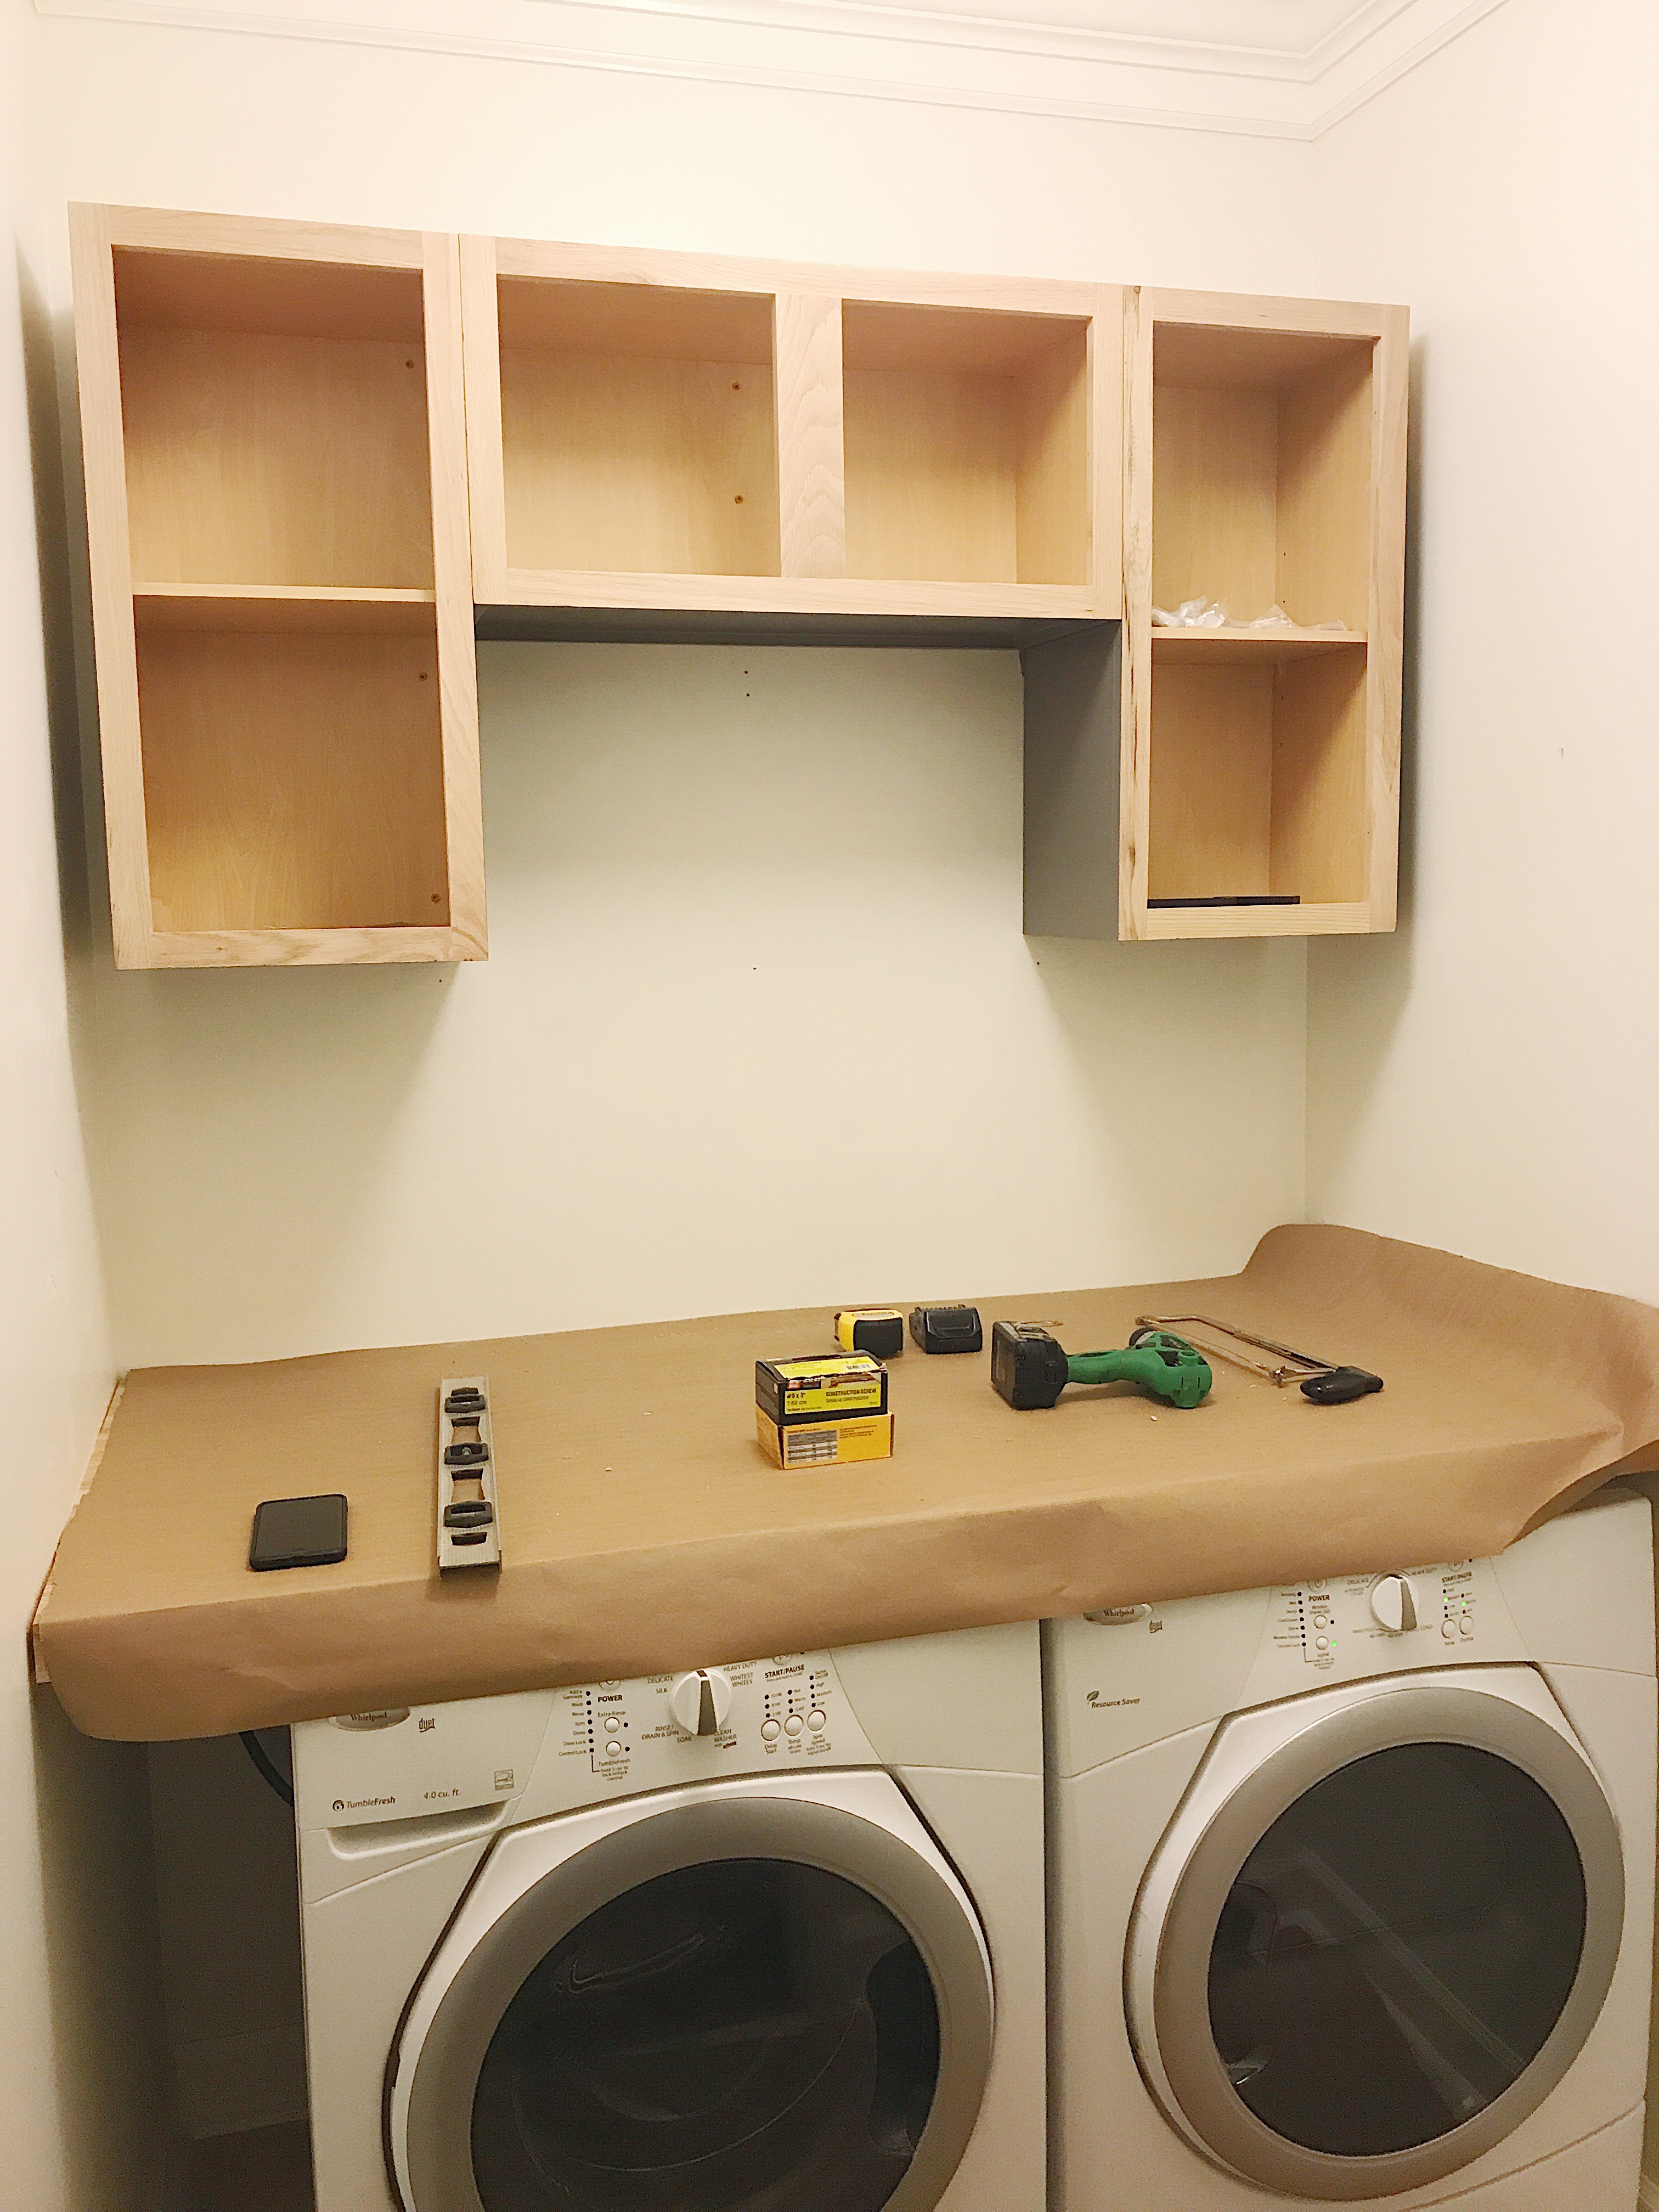
Here we are, week 4! I can’t believe we only have two weeks left before the big reveal of our modern farmhouse laundry room!! That fact brings me both excitement, and terror! This past weekend we were yet again out of town (Note to self: we have got to stop traveling during ORC!) so our progress has been limited but we still have several items to check off for this week!
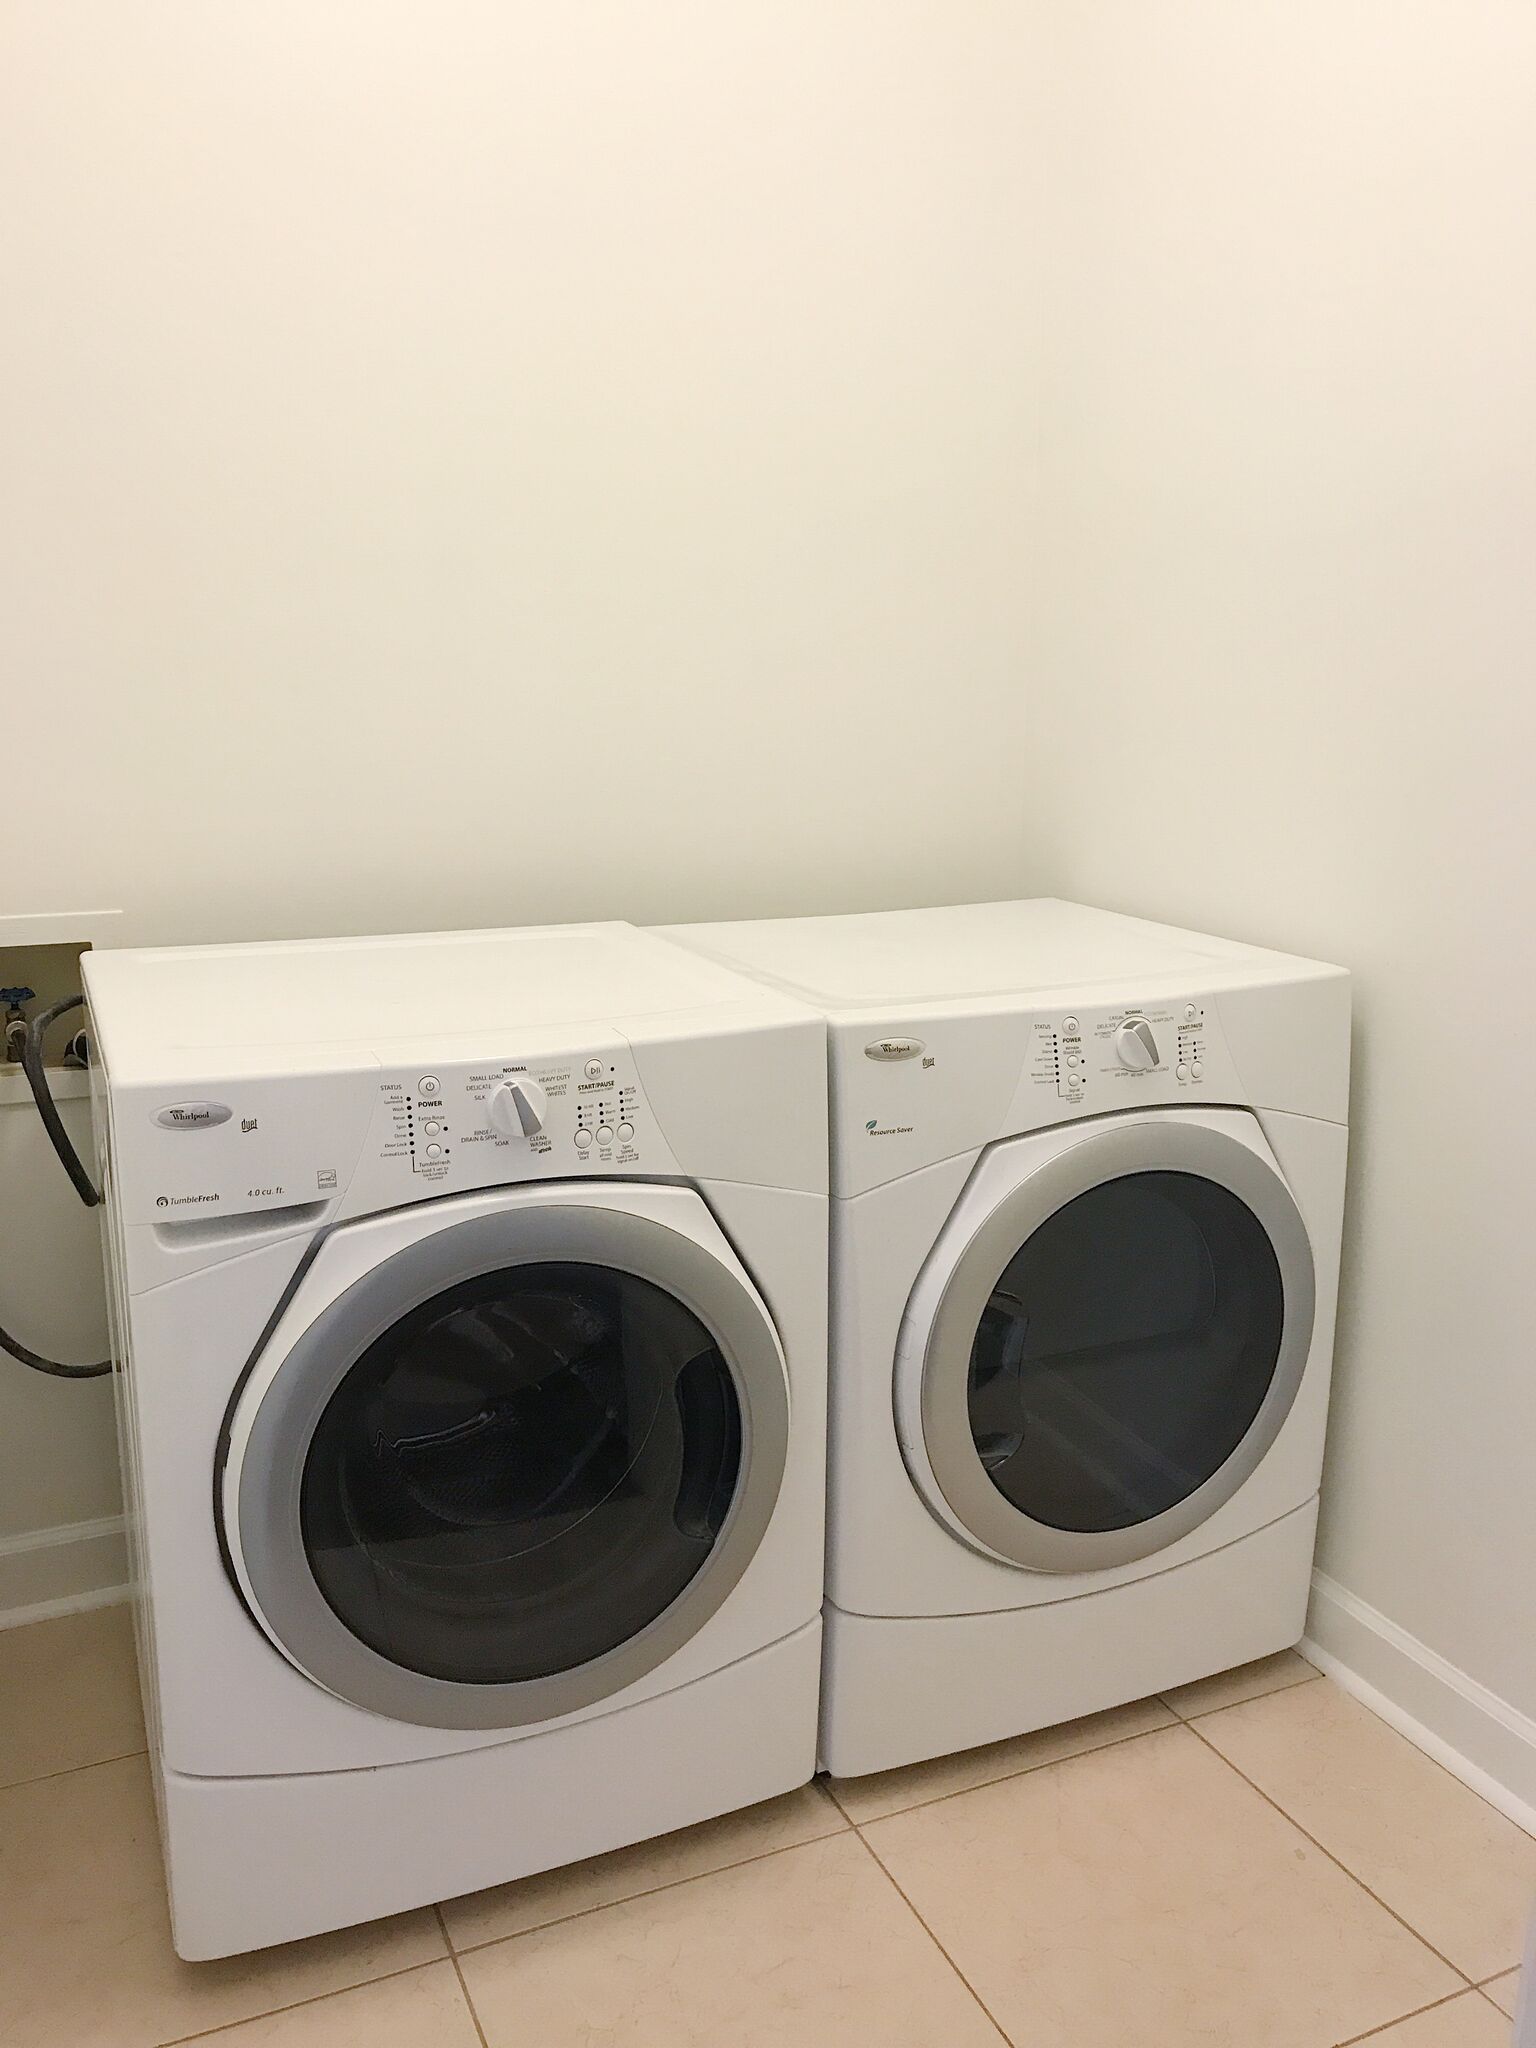
- Unstack the washer and dryer
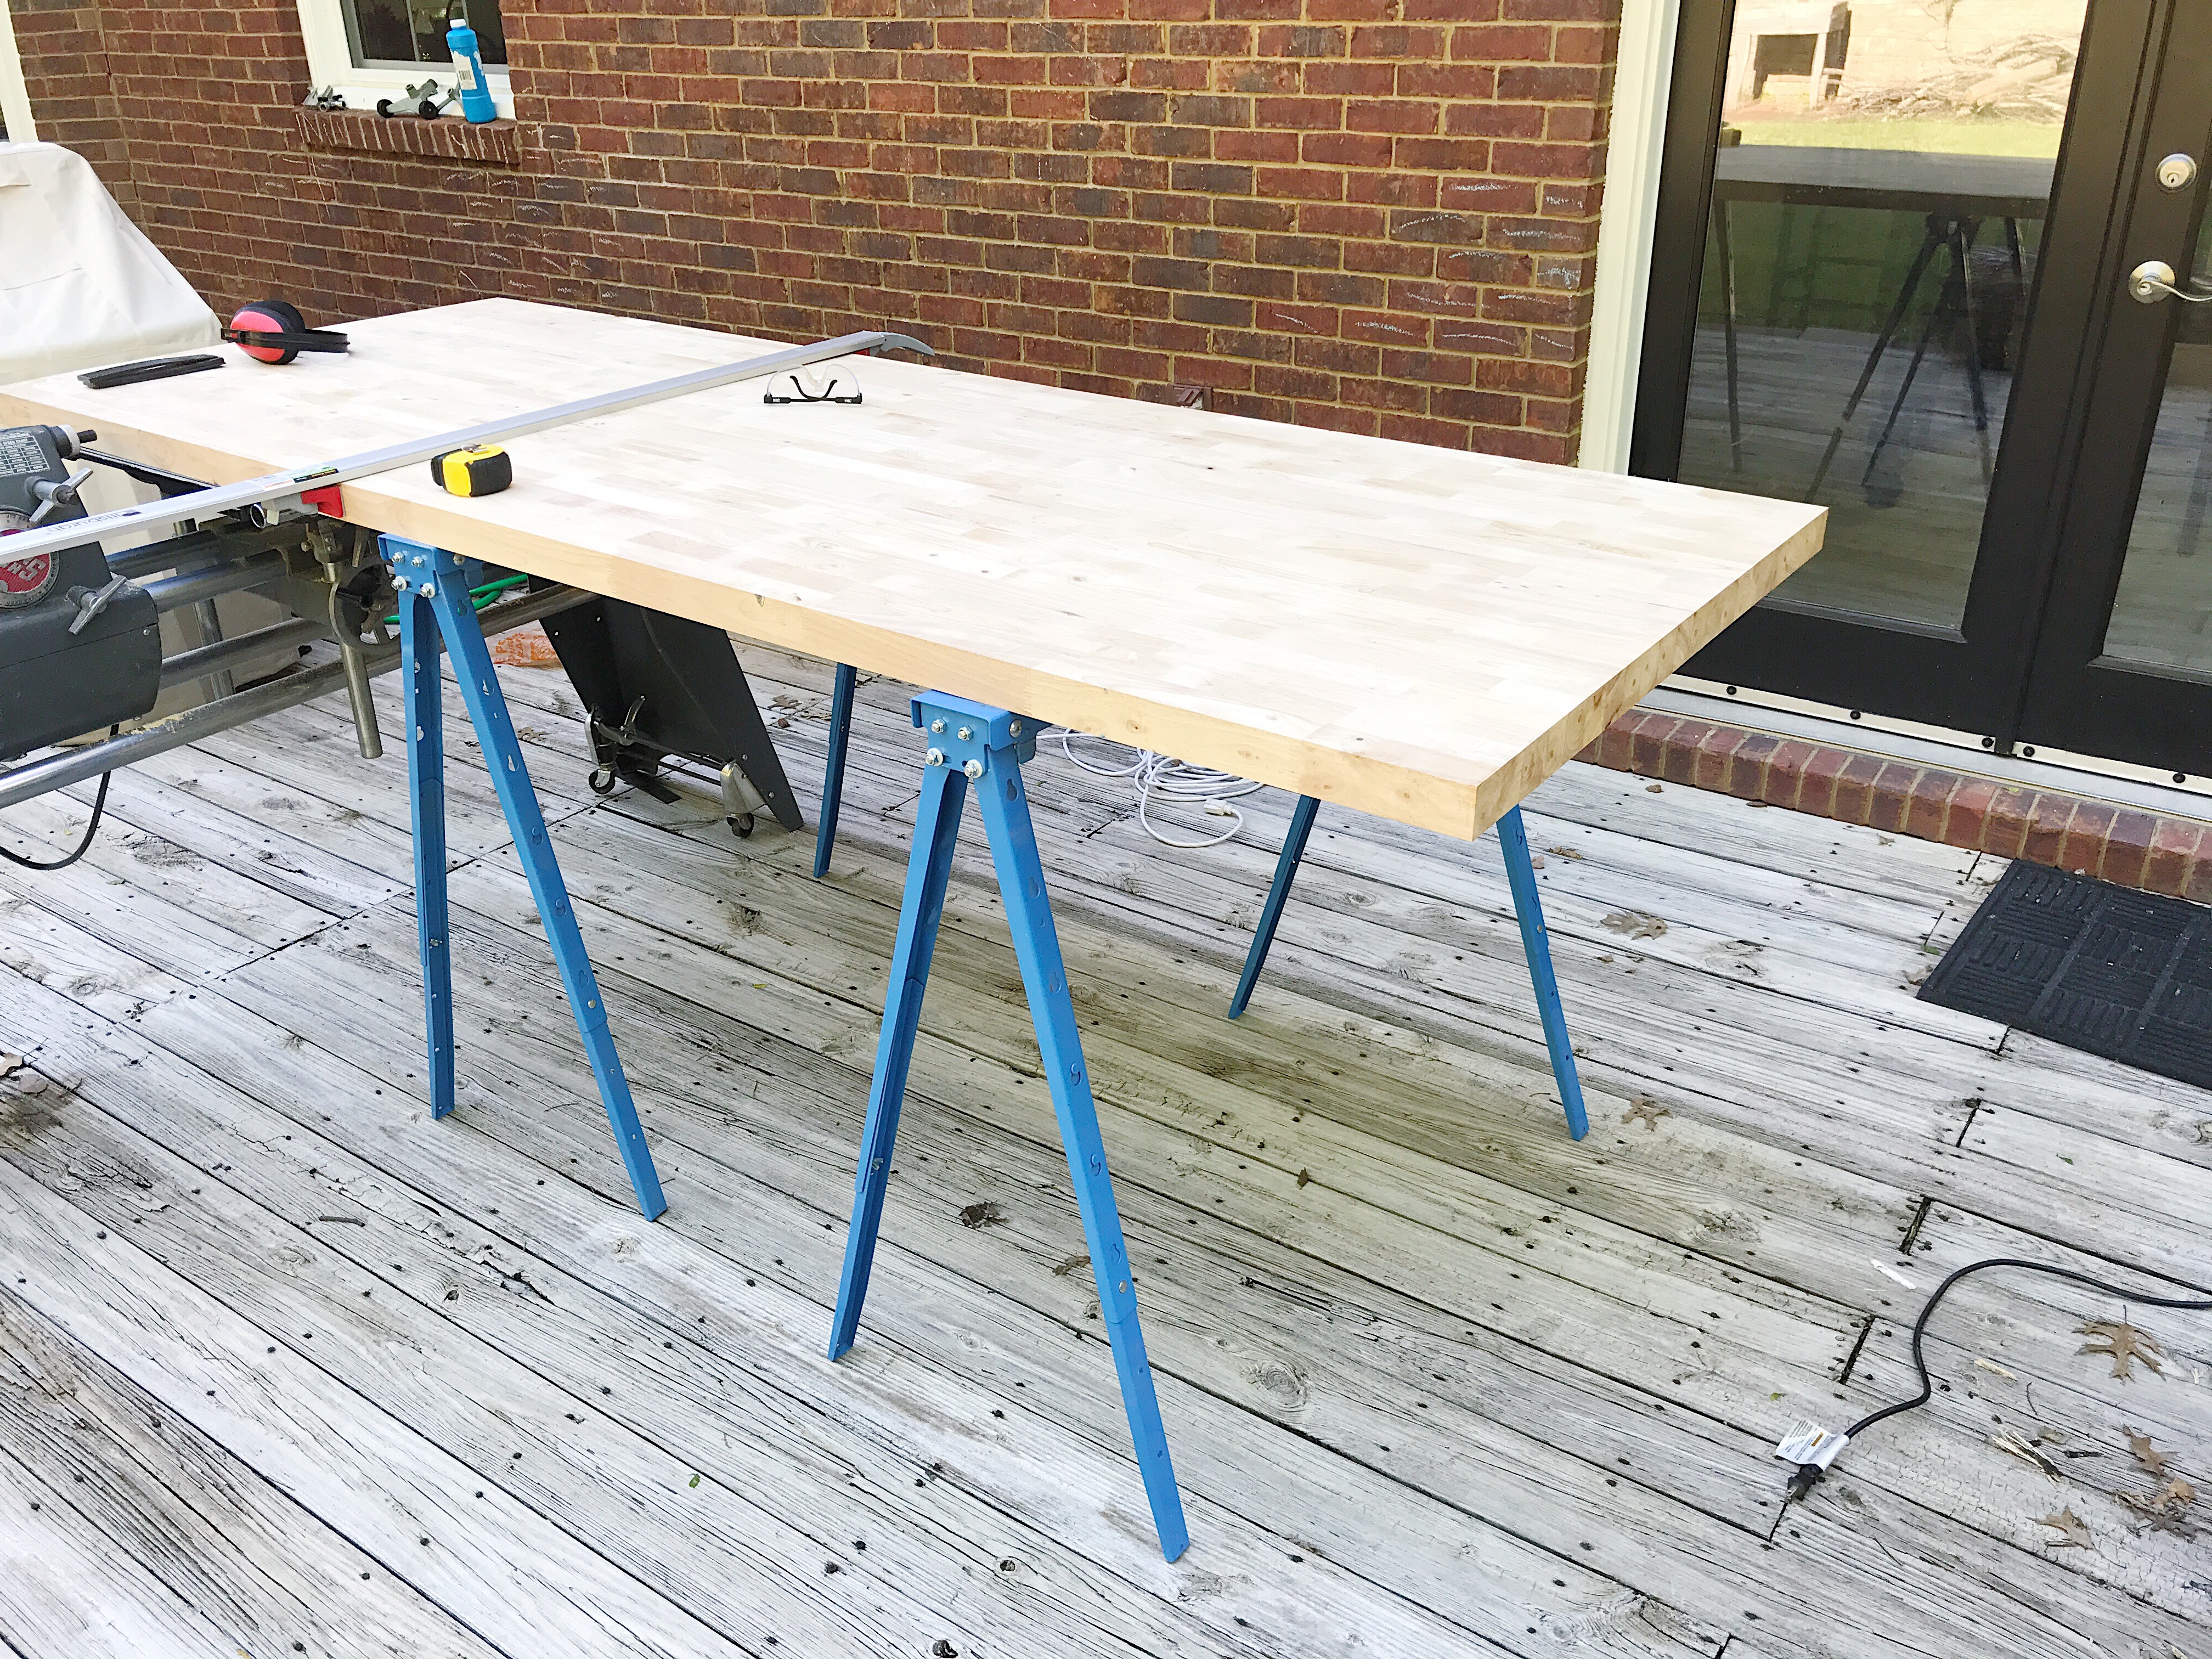
- Cut, seal and install butcher block countertop
- Fix the plumbing issues (such as the random pipes sticking out of the walls)
- Remove current shelving
- Sand and caulk cabinets
- Prime, paint and install cabinets
- Install cabinet hardware
- Paint the ceiling, walls, baseboards and trim
- Patch and mud the walls
- Remove old brown shoe molding and replace with white that is correct size
- Install subway tile backsplash w/ gray grout
- Install clothes hanging bar
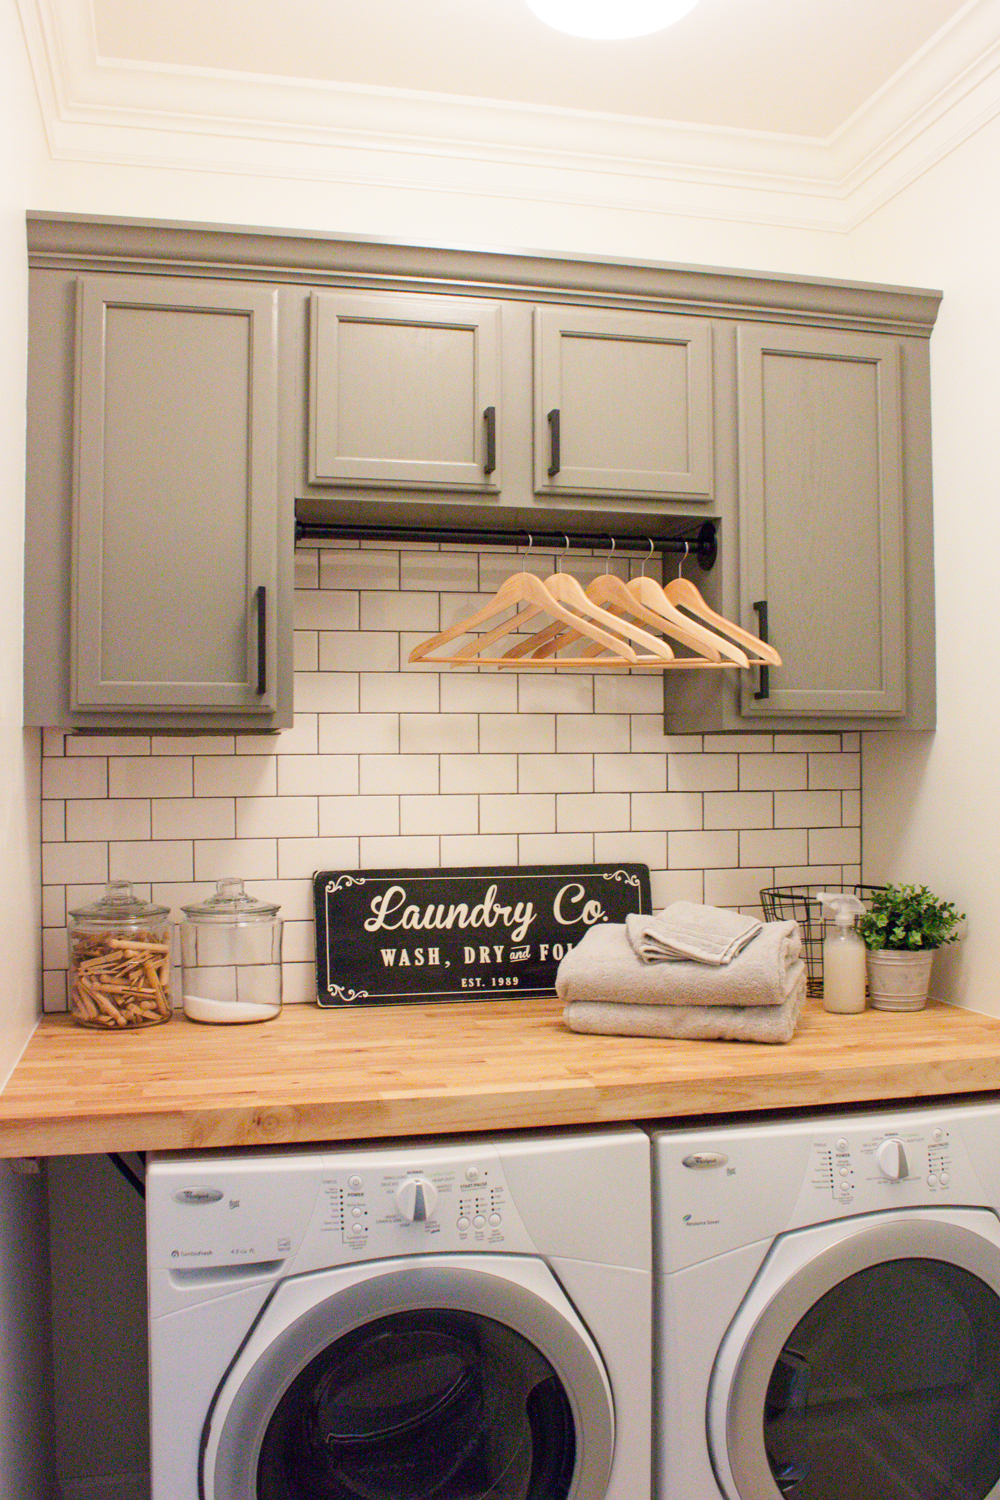
Here is the rundown: the walls and ceilings have been painted, the butcher block has been cut (we are getting ready to seal and install it), and the cabinets are getting prepped for paint! The washer and dryer have also been unstacked! Woohoo!! This week I also did a quick little DIY project that I am going to share with you today!
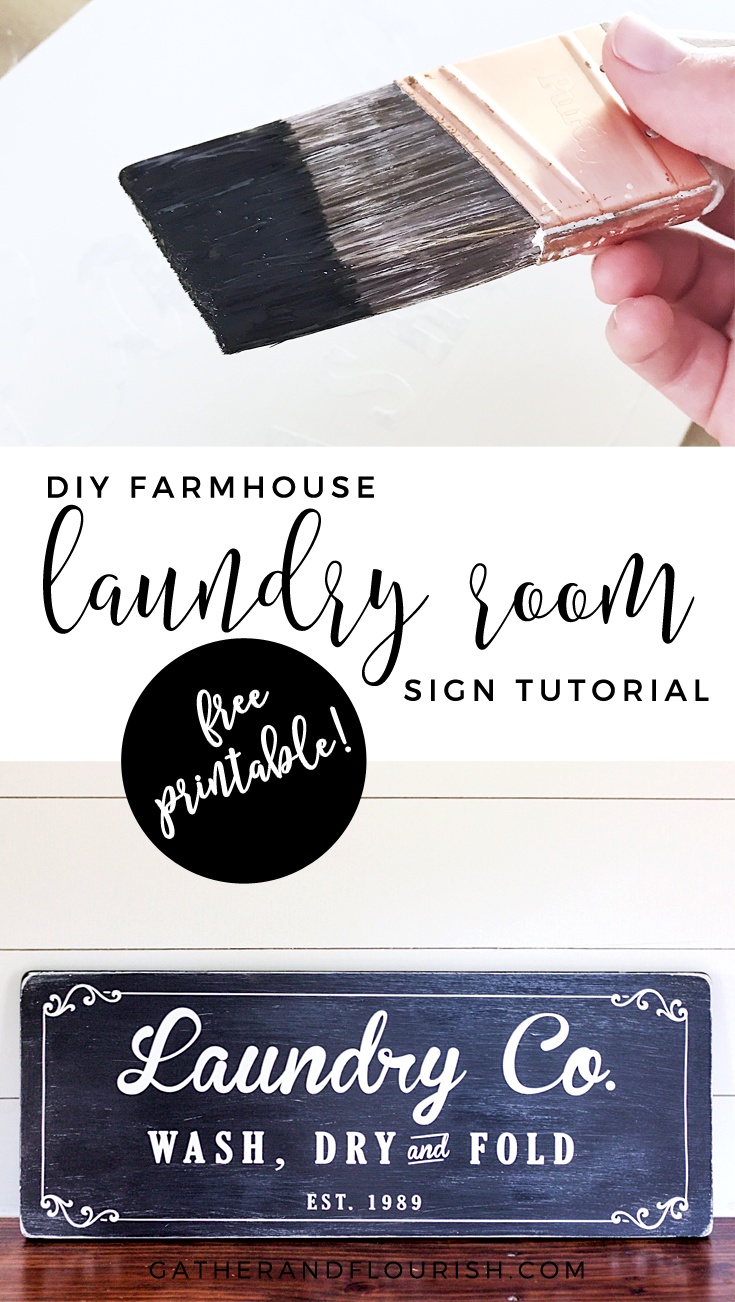
Farmhouse Laundry Room Sign Tutorial
Disclosure: This post contains affiliate links, which means I may receive a commission if you click a link and purchase something. Please check out our disclosure policy for more details.
Supplies you will need:
- Silhouette Machine
- Adhesive Vinyl or Contact Paper
- Transfer Tape
- Wood Piece
- White Chalk Paint
- Black Chalk Paint
- Sandpaper (or palm sander)
- Stencil Cut File
Instructions
- Download the SVG cut file (this limited-time free printable has expired, but is now available on Etsy).
- Open the file in Silhouette studio, and resize to whatever size you desire under the “scale” tab (make sure you have the box checked for “lock aspect” before resizing).
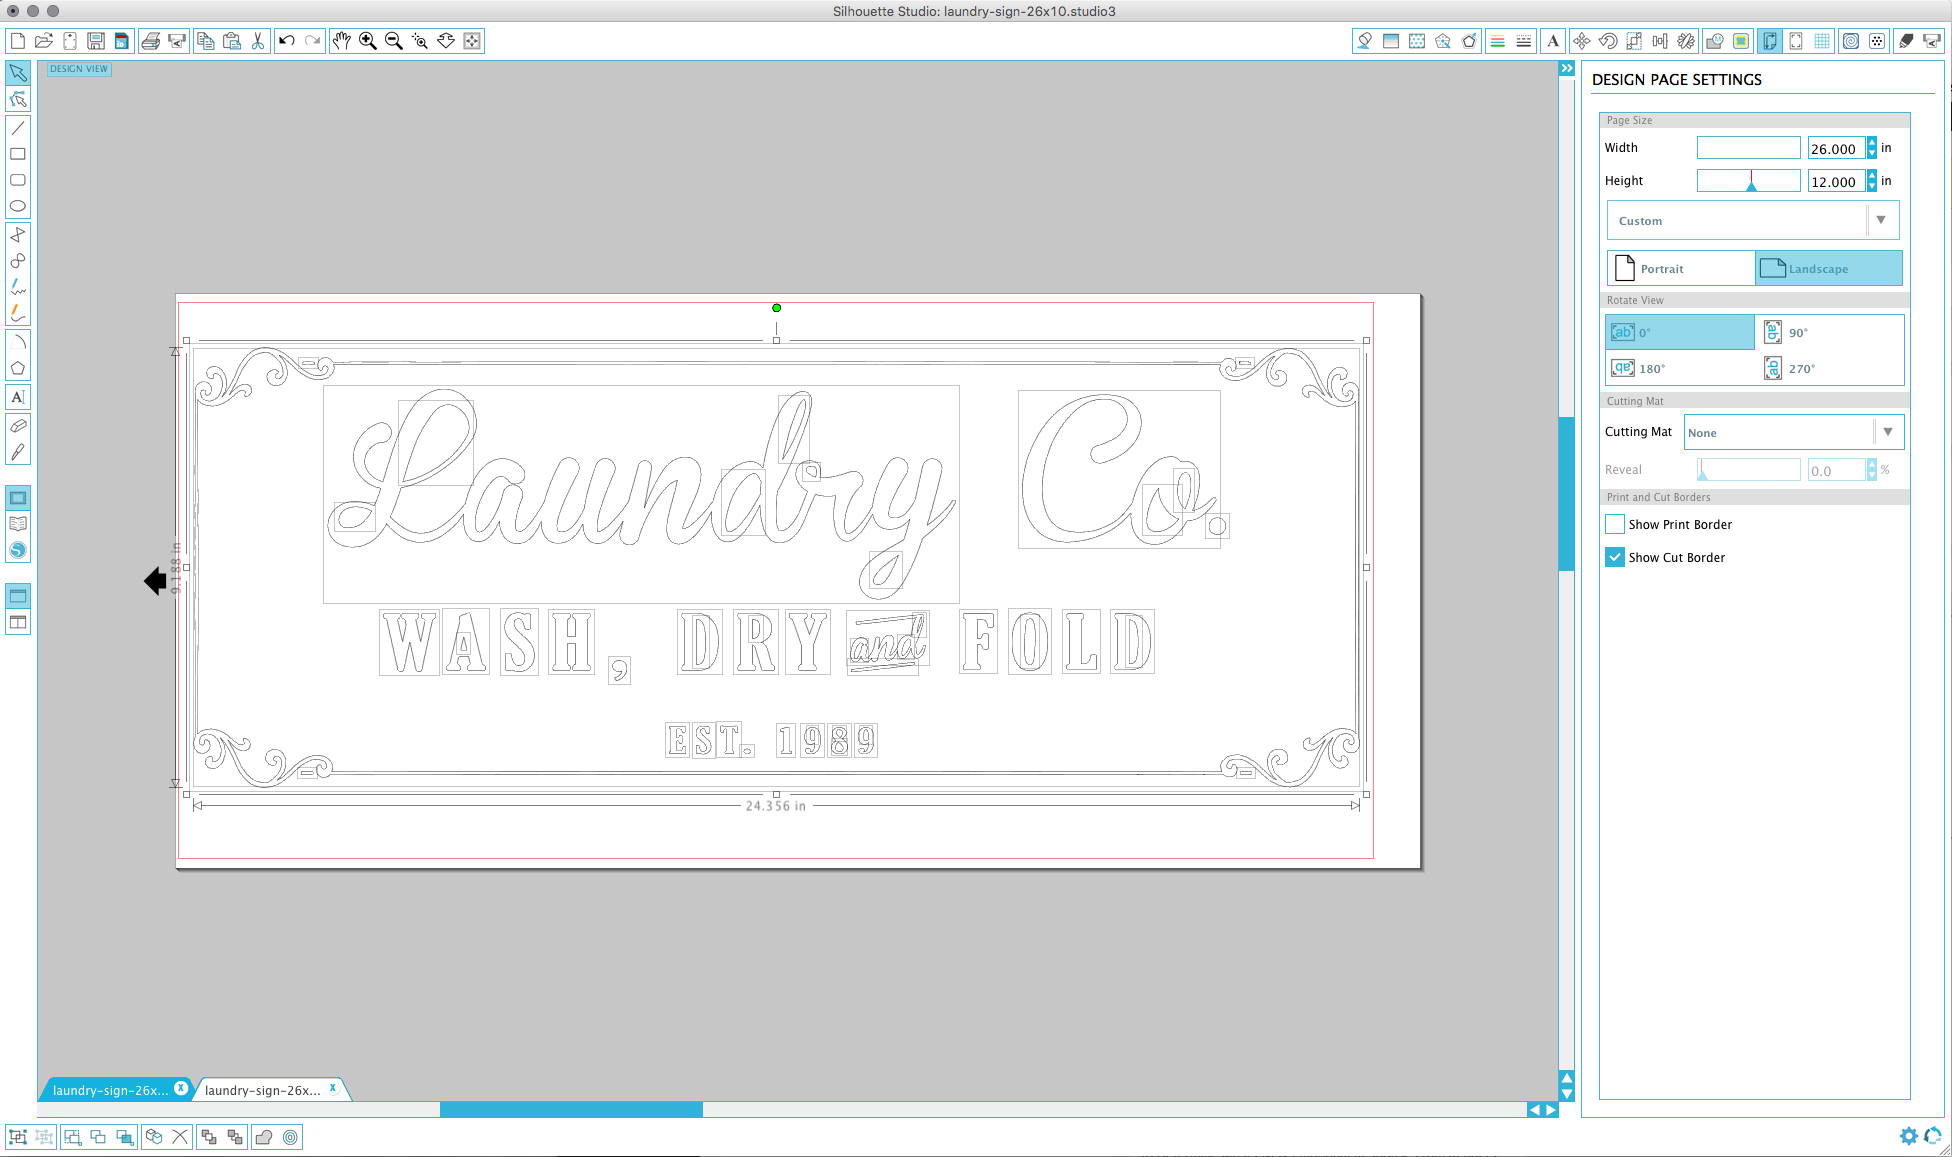
- Go to the “modify” tab, select the entire design then click “make”. This will make the entire design a compound path.
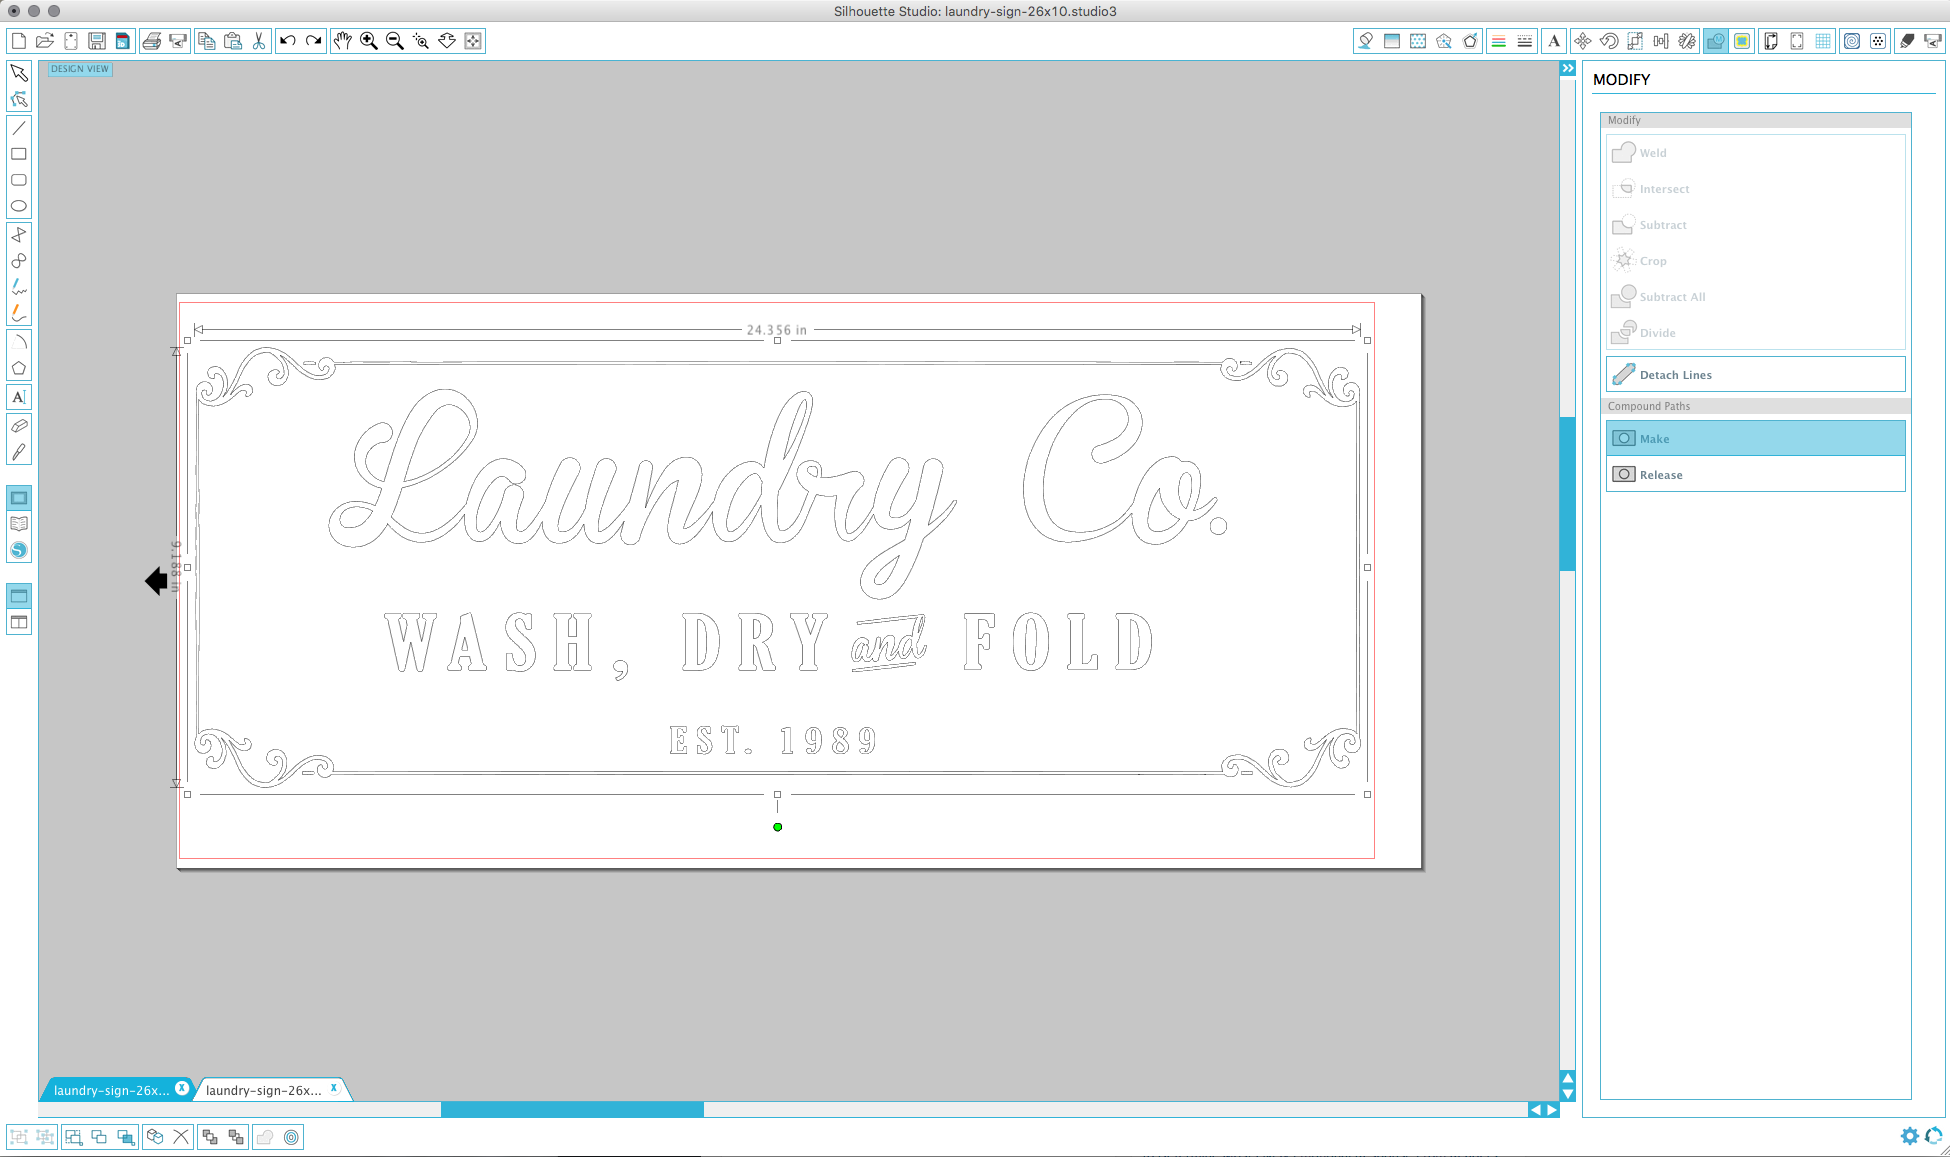
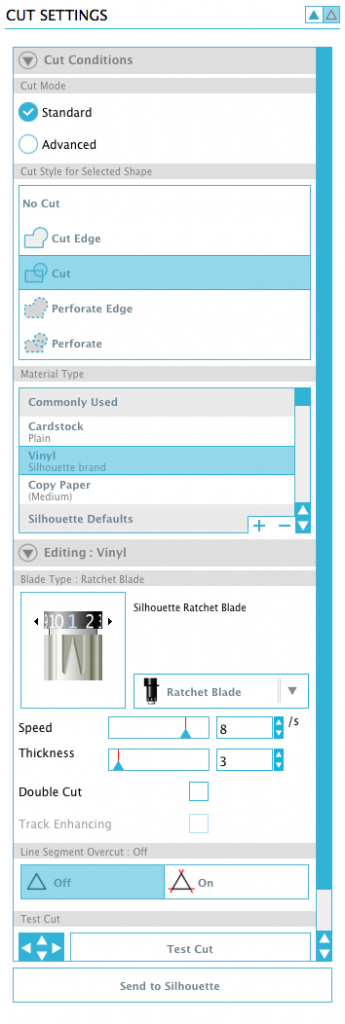
- Adjust your blade to the correct setting for cutting vinyl (you can view these under the “cut settings” tab). And make sure that under “Cut Style for Selected Shape” that “Cut” is selected. **If using contact paper use these settings (Speed: 8; Thickness: 3; Blade: 1)**
- Get your vinyl cut to the correct size (this file is set up to 12″Hx26″W but the design is for 10″x26″) and load media into machine.
- Send your design to your silhouette machine and start cutting!
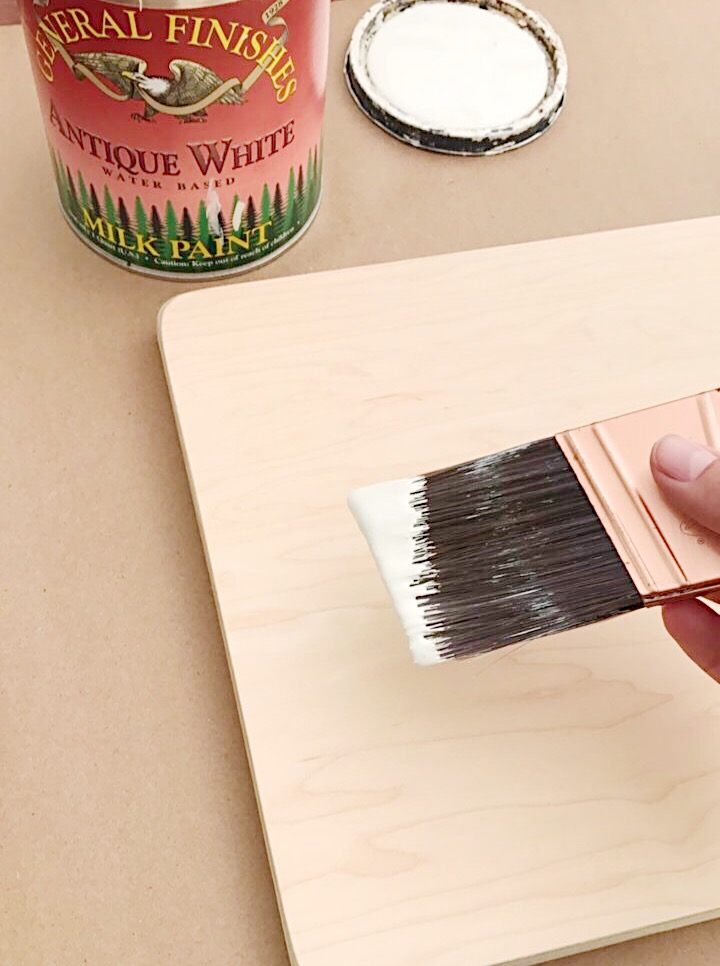
- While your design is cutting, paint your piece of wood white and let it dry.
- Once you have your design cut, weed out all the unwanted vinyl leaving your design on the vinyl backing paper.
- Use clear transfer tape (I cut mine to the size of my sign 10″x26″), and transfer your design to the tape.

- When your board is dry, remove the vinyl backing paper and place your design on your sign.
- Use a plastic scraper or old gift card to press your design onto the sign.
- Slowly peel off the transfer tape, leaving your design on your board.
- This next step is important to prevent the paint from bleeding through! Take you white paint and paint over your design again (this will seal the vinyl so that if anything bleeds it will be white into white).

- Once dry, take your black paint and paint over the entire board.

- Let dry until your design has set for 10-15 minutes (not fully dry), then begin to peel off the vinyl design.

- Let your sign dry completely, then lightly sand to distress.
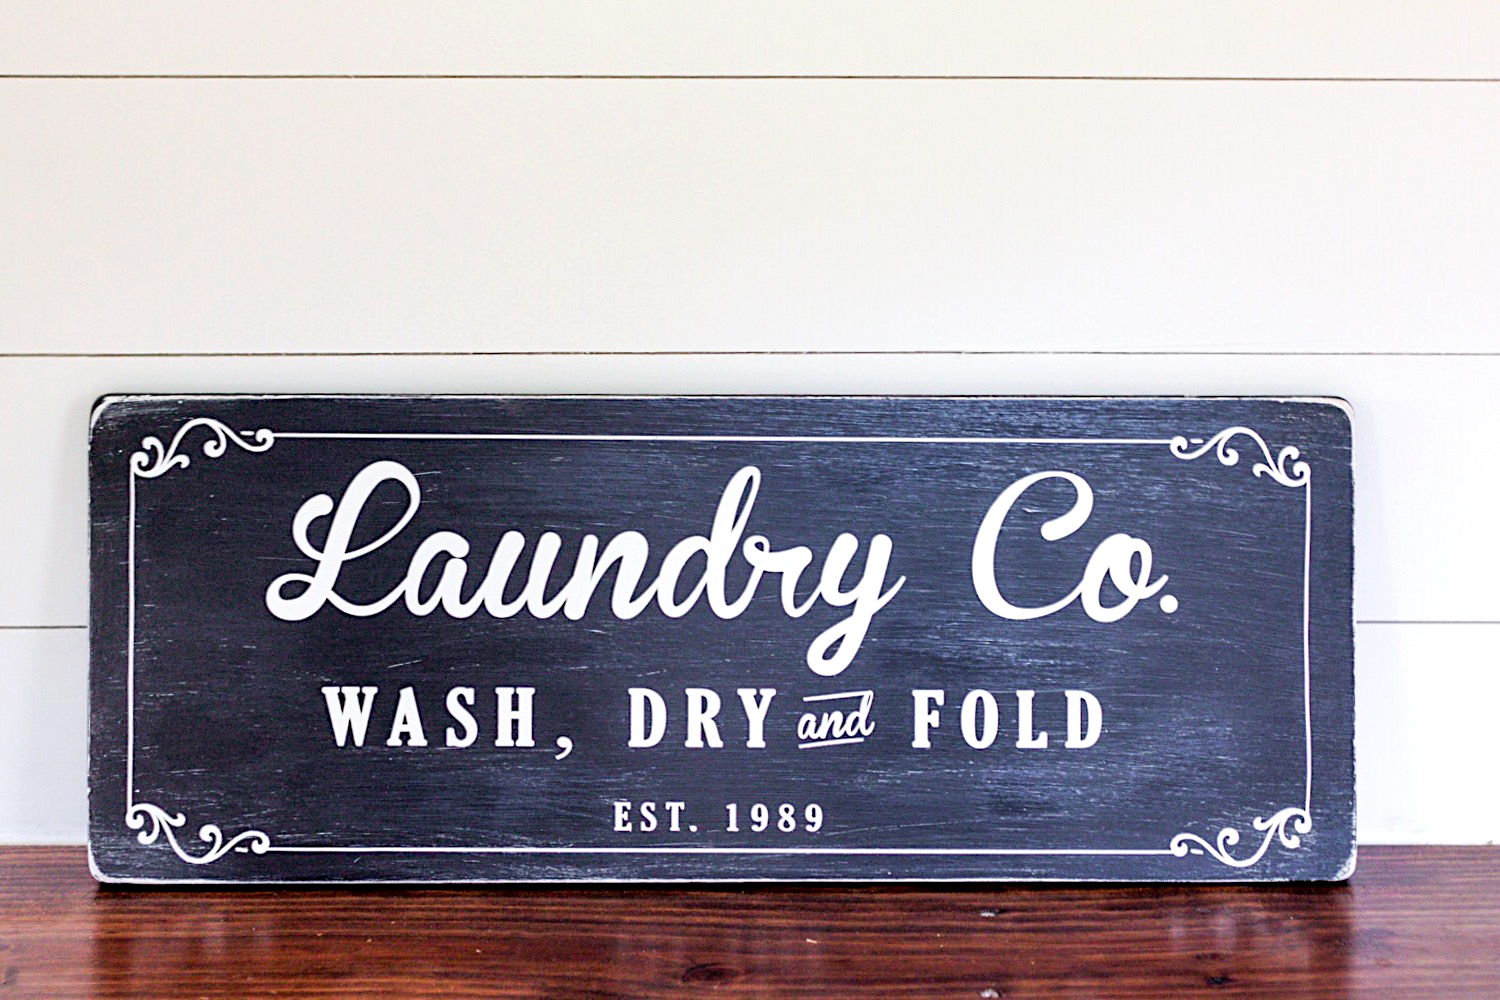
- That’s it! You now have your very own Laundry Co. sign!
PURCHASE LAUNDRY CO. SIGN SVG/DXF DESIGN FILES HERE
Have you ever used your Silhouette to make a DIY sign? What is your favorite use for your Silhouette Cameo? Let me know in the comments below!

Week 1: Inspiration
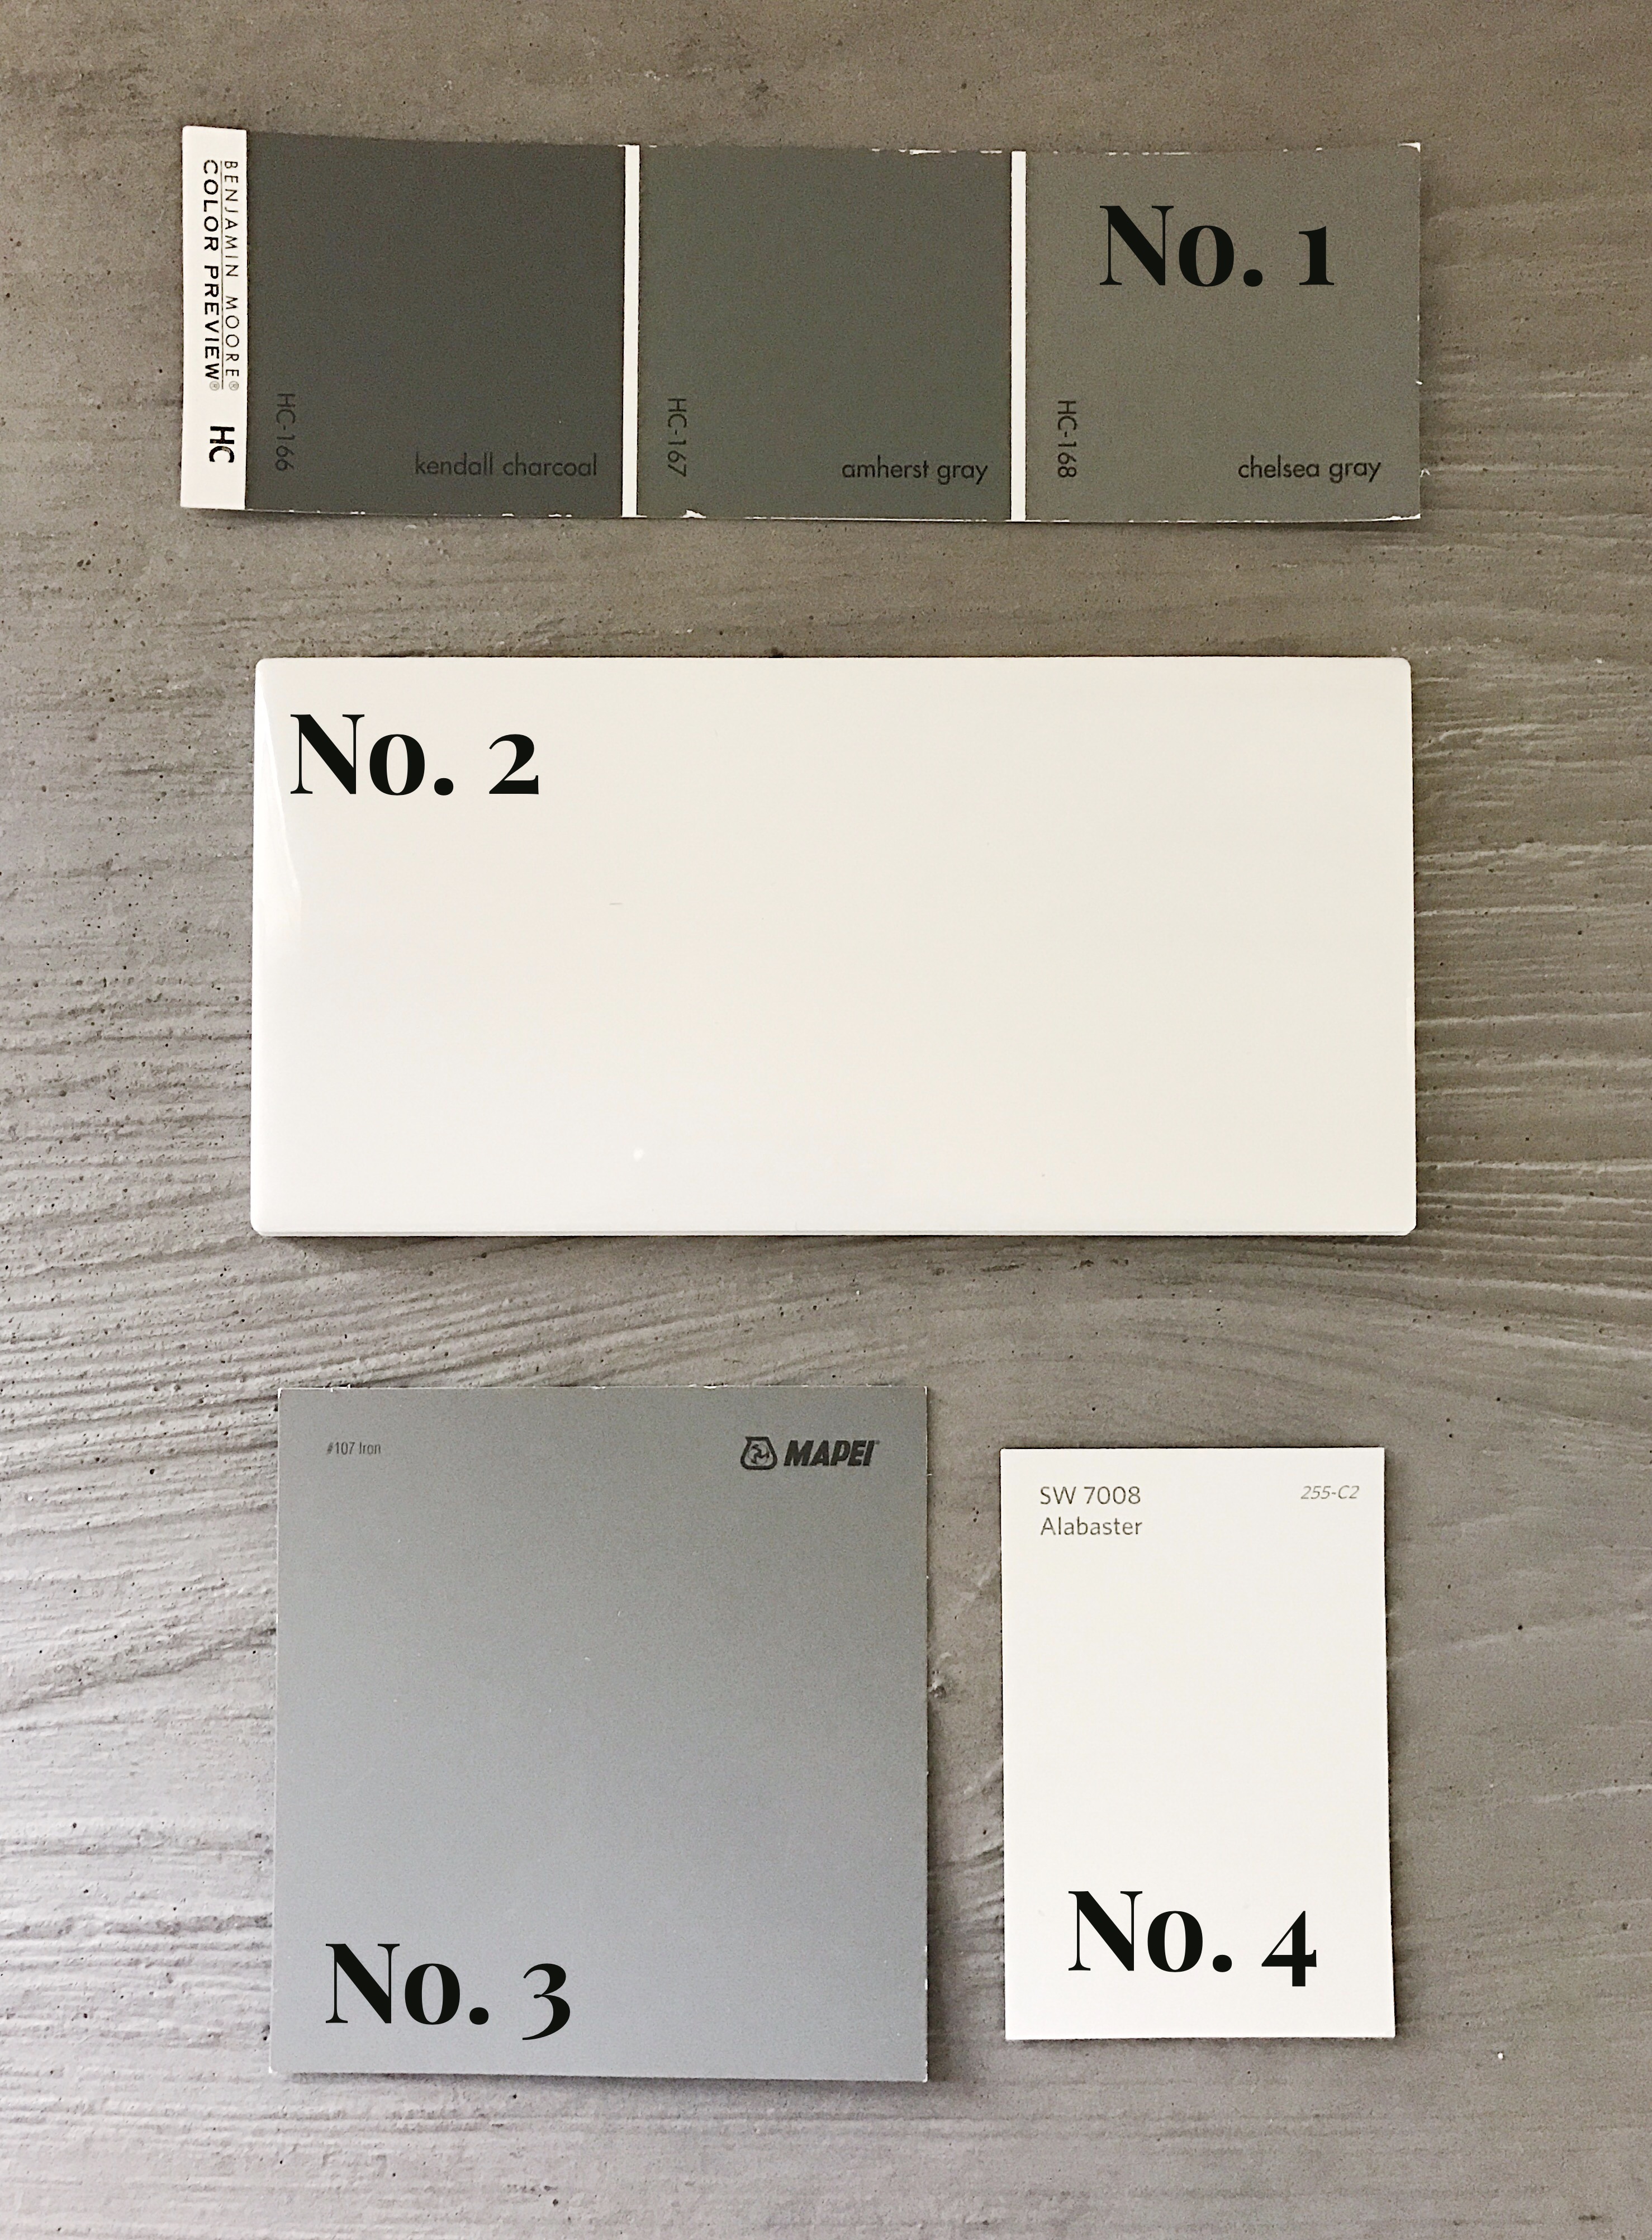
Week 2: Paint Colors
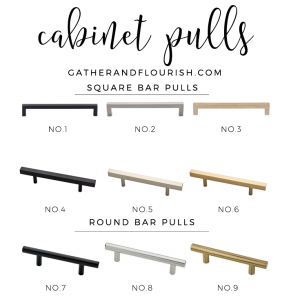
Week 3: Cabinet Hardware
Week 5: Installing Cabinets
Week 6: Laundry Room Reveal
Follow along on Instagram for behind-the-scenes photos and videos!
CoCo says
This sign is seriously so cute. I can’t believe we’re heading into week 5! I can’t wait to see how this space comes together. i love everything you’ve done already. It’s going to be so fabulous. Hugs, CoCo
Lauren says
Thanks Coco! It’s been such a fun journey watching it all come together!
Emy says
I just bought my silhouette and haven’t really played with it very much. It scares me a little. We did use it to embellish a 3rd grade science fair project though. 😉
Your sign looks great!
Lauren says
I’m a newbie at this too! I just got it a couple months ago and this was my 2nd or 3rd time using it! There are lots of great tutorials on Youtube!
Jessica says
What a great tutorial! Pinned for later
Cassie says
your sign looks fabulous! such a great touch to the space!
Lindsay says
What a great how-to! Can’t wait to see how the room turns out!
Lauren says
Thank you Lindsay! 🙂
Habiba says
Love this one! Now I only need one of those wonder machines lol.
Lauren says
Thank you Habiba! The silhouette machine really is a wonderful tool!
Ola says
Your sign is beautiful! I don’t have a silhouette but this makes me what to get one. I wish you the best for the rest of this challenge.
Lauren says
Thank you! I haven’t had my silhouette very long but I am definitely enjoying it! 🙂
Kelley Kelly says
Hello,
Ive saved the file and I am trying to download to silhouette. It is giving me an error message ” the file type you are attempting to access is not supported” any suggestions? Thank you so much!
Lauren says
Hi Kelley! I am sending you an email so we can troubleshoot the problem!
Jill says
Can I ask what paint you use? Do the colors bleed into each other when you sand? Thanks!
Lauren says
Unfortunately, because I was in such a rush I did not use proper cabinet paint, we simply used Behr interior latex paint. However, to answer your second question, the colors did not seem to bleed when we sanded but we used a very fine grit sanded paper which probably helped with that! 🙂